Showing posts with label DIY. Show all posts

Monday, October 19, 2015

Monday All Day

Sometimes it's just like that, right?

My Monday started with my 6yo sitting up in my bed, staring at me...

"Good morning mommy."

I smiled, "Good morning sweetie. Why don't you come over here for  a big hug."

"I peed the bed."

Sigh. "It happens. Give me a big hug anyway and then go change your clothes."

Maybe an hour later we were off to our morning work out, late, as usual. I didn't get upset...this time. What's the point?

I worked on a custom order, making the same exact sewing mistake at least 3, if not 4, times in a row! Very frustrating, but I pulled it through.

I began an art project with Kurtis only to realize every container of water colors, paintbrushes, white and brown paint, had all disappeared, just in time for me to want to use them. Whatever.

Later, I decided to help Kurtis make owl themed cookies to go along with the owl themed learning we've been doing for his first grade work. I bit the bullet and pushed aside any insecurities of feeling like the working mom who can't take the time to mix together sugar cookie dough from scratch and bought Pillsbury refrigerated dough. I was going to make this happen!!!

As you can see above, it didn't exactly turn out the way I planned. Which is basically the story of my life, in case you hadn't noticed. It's also definitely been the ongoing theme the past few weeks. I try to fight it at times and in those moments of fighting, life feels so overwhelming hard and impossible. When I choose to finally surrender, it all suddenly feels like no big deal. Funny how that works, eh?

I suppose that is the point all along. Surrender.

The cookies taste just as sweet either way. 

Tuesday, October 2, 2012

Natural Laundry Freshener

 I stripped my bed today & washed all the linens but that is because I was waking w/ spider bites so I figured they needed a good shaking.

But...I think I FINALLY found a natural laundry freshener that WORKS!

I make my own laundry detergent & at first the laundry REALLY smelled *clean*. No scent, just very fresh. Then my washer broke & I've went through 2 used ones since & they never smelled as *fresh* again...I was tempted to start buying expensive chemical laden detergent again from the store.

I began to put vinegar in the bleach part in the washer for the rinse cycle...it does help dispel odor but doesn't necessarily create a FRESH smell. kwim?

 THEN TODAY: I added 5-10 drops of Tea Tree Oil AND the vinegar & VOILA'!!! Totally FRESH laundry again!

 I can't really stand the smell of TTO - I can verify the laundry does NOT smell like TTO. It just smells clean & fresh!

Monday, December 19, 2011

A few of my favorite things


I purchased this Nativity set years ago from a thrift store. I liked the rustic look that it had. This year I placed it in the little niche area of my corner cabinet.


  I've had this set of deer since I was a newlywed, back when we only had one child. I thought it was so sweet looking and represented our family. I'd love to find more matching deer to include now that our family has grown so much. The cloth underneath the deer was a crochet piece my grandma made. I found it with her things after she died and I cherish it.


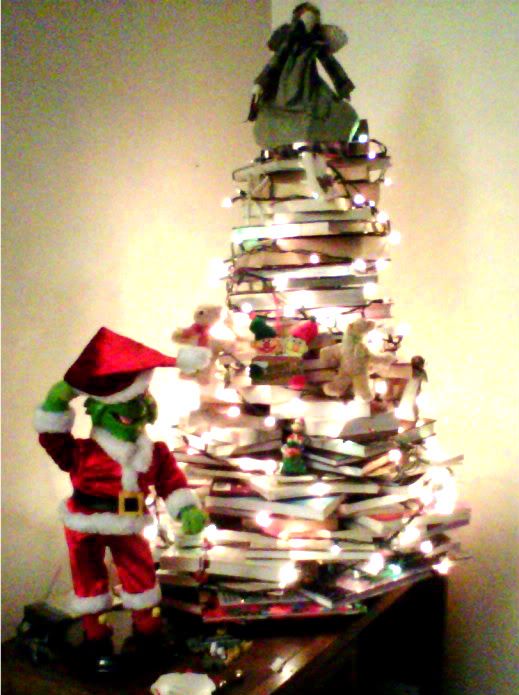
This is our Book Tree we made this year. Talk about *frugal*. We had a great time creating this, inspired by a few pix we saw online. We didn't need to spend any money and we also saved space in our small home. We placed this on top of a cabinet in our living room.

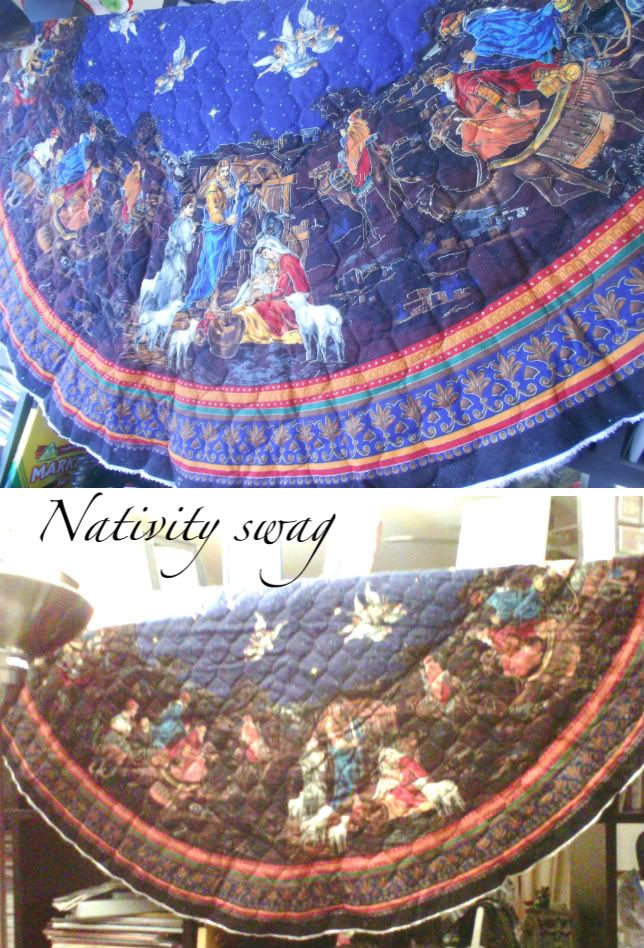
This fabric swag was acquired a few years ago in the clearance pile of fabric. I had been eyeing it before Christmas and really liked it and was excited when I saw it in the clearance pile. What I didn't know was that it was only HALF the panel. It's supposed to be a tree skirt. This year I hung it as a swag across my large bookcase that I use as a room divider. I think I really like it there.


This is my collection of Disney castle ornaments. I love Disneyland-everything about it. We used to go quite regularly and always managed to somehow visit during Christmas season too. This year, unfortunately, we were unable to work in a visit but I hold lots of wonderful memories at that park. Behind the castles, you can see my mirrored Advent calendar--also acquired via after Christmas clearance.


 Our front door is adorned with a memorial wreath, made with Rosemary from my yard. Rosemary is symbolic for *remembrance*. I wanted to create this wreath in memory of those who are not with us and we miss very much, my mother and my father-in-law.

Except for the little bit I spent for the wreath supplies, I did not spend any $$ on decorations this year. I used what we already have, some in new ways.


Linky to:
Debbiedoos Newbie Party
Savvy Home Monday
And


Tuesday, December 13, 2011

Christmas Book Tree


Hey! SO this is not one of those blogs that offers nearly professional pix of their home via a blog tour. Ok, just in case you don't know me and were expecting better. :-) I probably won't even have all my Christmas decorations up until the actual day of Christmas. haHA! I'll post along as I get things up, though.

We've done something different nearly every year, as far as getting a tree goes. When the Mr. and I were first married, we didn't even have our own place, so we didn't have our own tree. Once we did have our own place, we began a tradition of not getting our tree until as late in December as possible. We'd look for the most rejected looking, Charlie Brownish tree and purchase that one.

For the past few years we've gotten our tree earlier and earlier and bigger and bigger. Many years I'd cringe at the prices of trees--knowing I could get another gift or two for the same price. We always lucked out somehow. One year we randomly got a tree for free from a friend. That may have even happened more than once. Funny, I remember the same thing happening when I was little. My parents took us on a long drive to some random lot and guys were loading trees off big trucks. I got the impression it was a church group or something...but the tree was free. I don't know how they heard about it, a friend told them I think.


I cannot find the source for this pic (I saw it on facebook) but here is a link to another book tree post with tips if you are interested in creating your own.

The other day I saw a picture of this Christmas book tree. It was a tree made from books stacked on top of each other. Of course the pic I saw looked fabulous. All the books were hard back with lovely spines and they all seemed to be the exact same size.  I thought it was absolutely, fabulous! Ingenius!! So inspired by the pic above, I decided to go for it.


Today we committed to give it a try for our own home. I wasn't sure when we would get a tree and  not even sure I wanted to. (I'm not a scrooge--just wasn't sure I wanted to spend $$$ on something so unnecessary that we really don't even have room for)

Oldest helped me the most, aesthetically speaking, while Birdy helped gather books. We began stacking...and stacking...and stacking. Finally, it looked satisfactory enough. We added the angel on top, lights and a few ornaments. (ones that can take a fall, if it happens) I think we did a pretty good job on this 'knock-off' book tree.


We didn't have enough books to go any higher, but it worked out. I really like it. So...I think we'll keep it this season. ;-) ETA: The Mr. told me later he thought it was really cool! Cooler than he thought it was going to be.


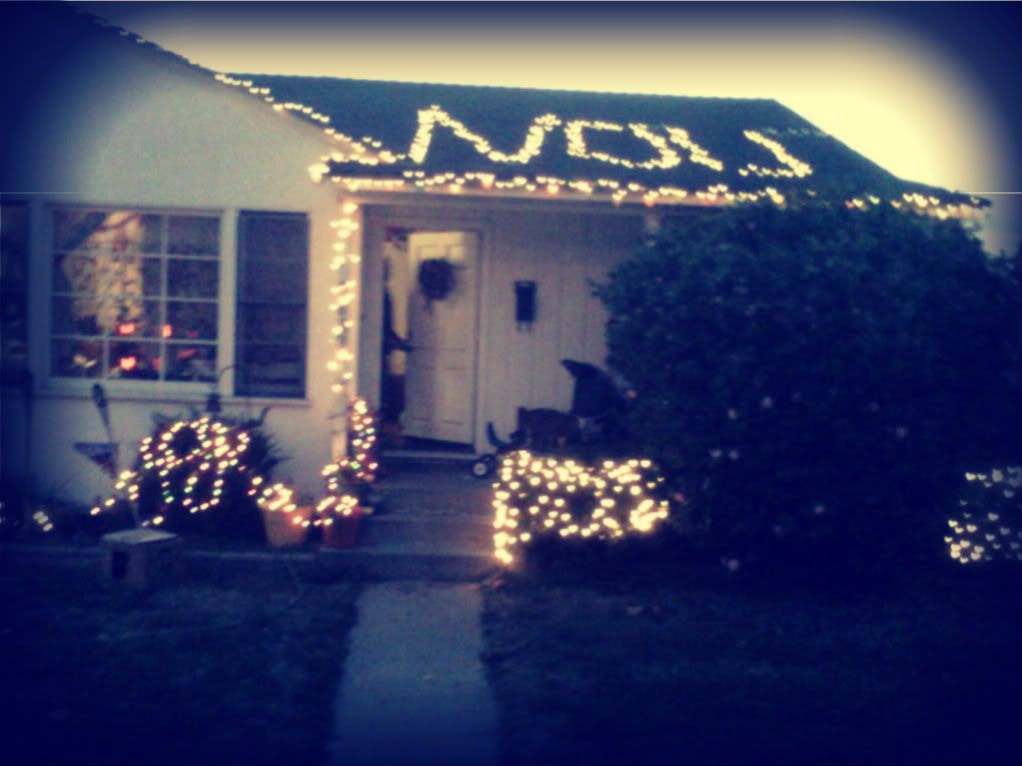
We've got our house lights up too, compliments to oldest and a featured guest, his friend Ian. Last year, after Christmas I hit the clearance and purchased a ton for ridiculously cheap....which have been hanging in our back yard for the past year. I think I will have to get more *after Christmas* for next year, again.  Personally, I say, you can never have too many lights.


So *these guys* thought it would be so cool to put "NO U" on our roof. Why not "LOL"? Funny guys!

What do you think.....more lights? 


Linked to:
We Did it Wednesday!
Show and Tell


Wednesday, July 6, 2011

FUN with water ideas for Summer!

Sure you can go buy water guns from Target, super soakers are NOT cheap though. OR you can save your dish soap bottles! Seriously, they work great as 'water shooters'. They are also the perfect size for small hands to grip & squeeze. It's simple: save your empty dish soap bottle, rinse well, remove the label (optional), fill w/ water, make sure the cap/spout is on, then SQUEEZE! You'll get a great stream of water AND save some plastic from the land fill.

To save water & your sanity when kids are running in & out to refill the bottles, just place a bucket of water outside for *refills*. 

OF COURSE, it goes w/o saying to use extra supervision w/ little ones around bucket of water: they tend to be top heavy & can flip into a bucket in an instant.

As an alternative to 'water bombs', you know those round, cloth balls or football shapes, sold by the water toys? Well, you can purchase giant sized sponges at any $.99 cents store or Dollar Tree and have the kids toss those around. These also make great replacements for water balloons.  Water balloons leave a bunch of tiny bits of rubber/latex all over your lawn--not fun & not good for your lawn or birds that might pick them up. Forget the mess and toss a soaking wet sponge back and forth instead! This way you also have a product you can reuse around the house when everyone is done 'playing'. Again, keep a bucket of water *outside* for instant 'refills'.

If you're feeling really crafty you can sew a nifty cloth cover over your sponge, like the brand name 'water bombs' have...OR....check out these super crafty & adorable 'wet water sponges' (aka: DIY water bombs).

Aren't these the cutest water toys you've ever seen? Don't you want to run out *right now* & buy some fresh sponges to make these? ME TOO!

One last tip for outside fun with water...a friend said she sends her kidlets outside w/ a small bucket of water & paint brushes to 'paint' the sidewalk. Great! Call it secret, invisible spy art, when it dries & you're set!

Sunday, June 12, 2011

Scrub-a-dub-dub

Yesterday, my friend Megan & I hosted a soap & detergent making workshop. We all had so much fun. making new friends, meeting new women, chit-chatting & of course, learning a money saving new skill. She instructed us in how to make our own bar soap & I showed everyone how to make powdered laundry detergent.

We ran out of lye (apparently we use all our mental energy being creative & have none left for basic math skills--go figure) so the two of us weren't able to make our own soap.  I knew I had some lye @ home and couldn't wait to try out the basic recipe.

A quick google research resulted in lots of various methods and recipes.  I decided to stick w/ the basic recipe Megan taught us and added oatmeal, cinnamon, nutmeg and bit of sweet almond oil. Sounds yummy doesn't it? If it wasn't for the LYE--it would be edible. haha. Instead of using plain water, I boiled a cinnamon stick in it first, (just lightly) to test if it would altar the color and scent. It did make it a bit more tan tinted but the true color won't be fully known for a few days at least.

Who knew it was SO simple? and SO inexpensive? Proctor & Gamble has been making a KILLING off our ignorance! sheesh.

The picture above is the soap freshly poured into a disposable pan just because I didn't have anything else to pour it into. For some reason *my* mixture wasn't thickening like everyone else's was yesterday.  Therefore, when I tried to pour it into a cute, flower shaped bread pan mold--it seeped through the end cap--FAIL!...ugh. So I had to put my double batch into this flat pan instead. I think if I hadn't been experimenting w/ my own concoction--it would have thickened nice and quick and held in the flower mold. You can see the oatmeal grains and spices--this makes the bar an exfoliate.

Yesterday we had a few scented oils and fresh herbs to work with. The rosemary smells so good and I was tempted to go with that today but I also wanted to use oatmeal...so next time. You can't really smell anything with this batch but I'll let you know when it is all cured and ready to use. It is safe to touch within 24 hours--so I will cut it tomorrow. Then you let it sit to 'cure' for about 3 weeks, which is letting it dry out more.

I found so many different recipes online. Instead of plain water you can use various teas to create green tea soap, for example. Or the new trend is to have caffeinated soaps to invigorate the skin which can be accomplished using black tea. You can also tinker with various 'fats', which are the oils you use to create a soap that is more moisturizing or vegan. Pretty cool huh?

Oh and of course it is very inexpensive! I mean super cheap.  Yesterday's batch created about 56 bars--depending how they will be cut--for about $20! That is comparable to Ivory soap which is around $4 for about 10 bars.  The big difference is that this soap uses no animal fats and is a higher end type of soap that normally sells for around $4 *per bar*! So for the price of the *cheap* soap you get the *good stuff*. And these home made bars make FABULOUS gifts!!!

I'll let you know how my oatmeal experiment turns out...so far it just smells really oat-y!

Wednesday, June 8, 2011

DIY Deodorant

All you need are two simple ingredients to create your own deodorant for super cheap! Tea Tree Oil (found @ Walgreens) and Baking soda--found anywhere else (local grocery store should be the cheapest place).  Really that's it.

 
Otherwise this is the recipe:
1/2 cup of baking soda
3 drops of TTO
Mix with spoon. 
Voila'!
 
How do you use it you wonder? Because you are so used to store bought, white solid bars of chemicals and crazy additives that are suspected cancer irritants? (there isn't any real evidence linking deodorant use to cancer but there have been studies linking the use of deodorants & antiperspirants to increased risk of Alzheimers)You simply dip your fingers in the powder and apply to your underarms. If you prefer something more traditional but still safe, you can add the coconut oil until it is a paste and even put it into your old, empty deodorant container. Store it in the fridge to remain in a solid form.  You can also add various essential oils to fragrance it like lemon or orange or lavender, whatever you prefer.  That does raise the cost factor a bit but what is cost when you smell good, right?

Why does it work?
Well, we all know baking soda absorbs odors right? That is why one of the most commonly recommended uses for it is to stick it in the fridge to absorb odors and help prevent freezer burn flavored food. (or you could just keep your fridge clean) The TTO is naturally antibacterial. Odor is caused by bacteria under the arms.  Sweating doesn't produce odor on it's own, if your body is clean and you sweat, you don't smell bad, you just smell like sweat. After awhile though, bacteria forms and *that* is what begins to cause what is commonly referred to as 'body odor'.

If you are not used to going au naturel', it might take a week or so for your body chemistry to adjust and get used to working the way it's supposed to. Which means sweating like your supposed to and not because you've been telling your body not to sweat, no matter what you are doing, when you wipe on that artificial chemical laden deodorant. Truly.

The TTO is not particularly cheap when you first purchase it. But it has tons of uses and is well worth the initial investment cost. For this 'recipe' you only use but a few drops.  Most other uses of it are only a few drops at a time as well.

A small box of baking soda can be purchased for around $.60 on average.
The total cost for this is less than a dollar and pennies per use. I don't think it can get any cheaper than that. I tried using baking soda alone, it was ok but the addition of TTO knocks any *hint* of odor right out!

I've been using this 'recipe' for a few months now and it works fabulous! No odors--trust me I checked. ;-)

Oh and btw: you can brush your teeth with this too. If you are so inclined. 


Saturday, April 30, 2011

DIY laundry detergent

I, like most people these days, am always looking for ways to save money.  It's one thing to cut costs down to the basic and most bare essentials but can you cut more? Actually, yes you can. For example something as essential as laundry detergent. I already purchase the cheapest brand for our area, Arm & Hammer Laundry Detergent.  I have seen the cost rise dramatically over the past year though. Even though I use less than the recommended amount--with no ill effects, I knew there had to be a cheaper way.
I have heard of making your own laundry detergent but didn't make time to do it. I finally found the ingredients and went online last night for the exact recipe. Most online sites for DIY detergent instruct you how to make the liquid kind. It gets rave reviews but I prefer the powdered and with a toddler in the house, I can store the powdered kind much safer than a huge bucket of gelatinous liquid detergent.

Whoa! I should have done this YEARS ago! It was RIDICULOUSLY easy to do. Who knew!?!

I looked online for the price of powdered Arm & Hammer detergent--I couldn't remember what I paid last I bought it, myself.

120 loads: $28.93 = $.25 per load  (this looks high to me--I think it's cheaper in the store-my local Target)
The liquid (from Walmart) is 35 loads: $4.97 = $.14 per load.
TIDE powdered detergent (from Walmart) is 120 loads: $17.97 = $.14 per load

14 cents doesn't sound too bad, right?

I purchased a BOX of washing soda & calculated the price per oz.  I was then able to figure out the cost of how much I actually used in this first batch.  Same thing with the Borax and the bar of soap.

Ivory brand bar soap is the cheapest where we are and what I usually purchase. At Walmart you can get a 10 pack for $3.76. Each batch uses 1 bar = $.37

I used a bar of Dr. Bonner's Castile soap it was much pricier but I've heard great things about it & it smelled wonderful. It also created about 1.5 cups of grated soap. So I made 1.5 'batches' detergent.

 Recipe I used:
1 bar of Dr. Bonner's Castile soap: $4.49
1.5 cups washing soda: $.87
1.5 cups borax: $.48

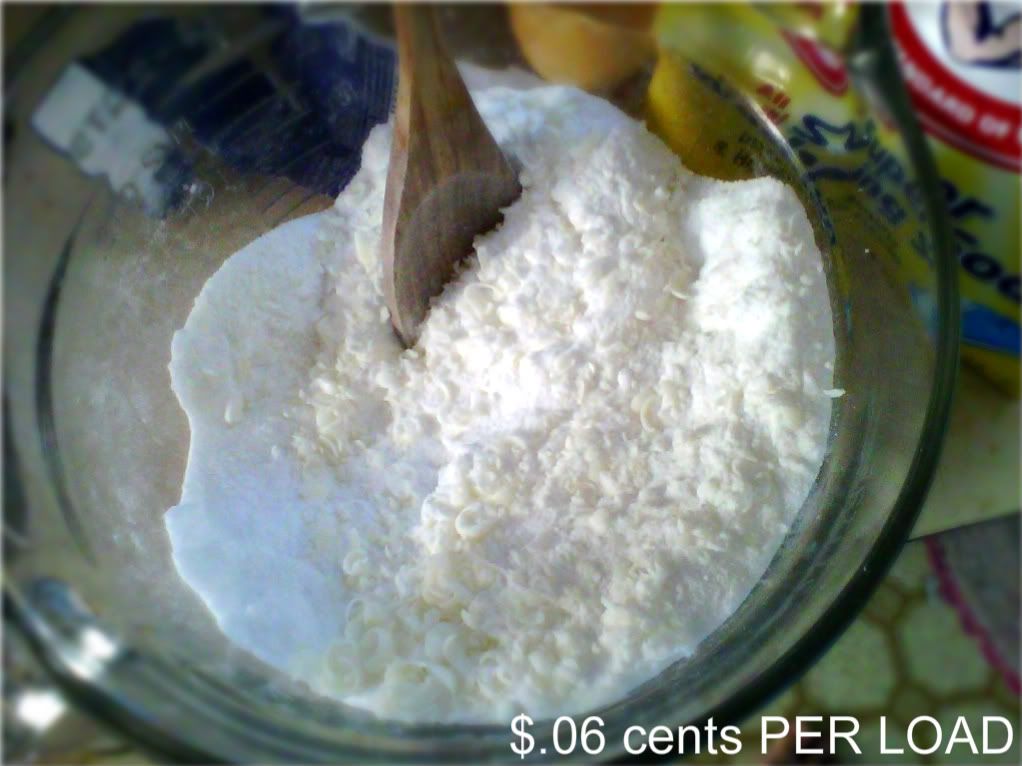
TOTAL: $5.84 = 96 loads = $.06 PER LOAD!
& that was w/ the EXPENSIVE castile soap!

If you used IVORY it would be $1.72 = 96 loads = $.01 PER LOAD!

Isn't that RIDICULOUS!?!

Convinced yet?
You can play with the measurements to find what works best for your laundry needs.  There may be variances according to your washer type (like HE for example) or water (hard or soft).

Here is the BASIC powdered detergent recipe:
1 bar of soap OR 1 cup of grated bar soap
1 cup washing soda (usually it's Arm & Hammer brand NOT baking soda)
1 cup Borax

Grate bar of soap
Mix ingredients together until it is as fine as you can get it or are comfortable with.
Voila!

YES, it's THAT easy!!!

Use 1 tbsp per load. 
Yes just ONE tablespoon is all you need. Possibly 2 if it's heavily soiled laundry.
This recipe should be enough for 32-64 loads of laundry. (I based my calculations on 64 loads & remember I made 1.5 batches worth = 96 loads)

 And I found another detergent/soap free option for those who are more naturally minded. I have no experience w/ these. I calculated their cost per load to be the same: $.01 PER LOAD.
Laundry Ball

You can google if you prefer the liquid, there are lots of instructional sites & blogs.
Also research if you have septic systems. I found contradictory info on whether home made detergent is safe or not. It's YOUR call to make.